Monday, 21 December 2015

A weekend with " LOVE" layout for BoBunny.

Helloooo


Well this layout came about as a little misinterpretation on my behalf .. 
You see I had a BoBunny design team assignment, to use this gorgeous Love &  Lace collection , mixed with a little mixed media and I was to use the pretty new laser cut chipboard pieces..

All well and good till I got the end and then realised I didn't even use one laser chipboard piece ha ha ..

But that is ok.. I LOVE this layout and had so much fun creating the background with the stickable stencils, stamps and the glimmery and super shimmery gold glimmer spray. I ended up covering most of the background but that's ok, maybe next time I will have more peeking through. 


Here is a little peek into how I start to play with my layout.. I add, take away, shuffle and walk away a few times before I decide on anything. So I usually take a photo of how I like the layout and then 

I copy the photo then  when I am starting to adhere everything down.  


And then this is the final product, a layout full of Love & Lace goodness.


Thanks so much for stopping by

Till next time 

Much love
Bernii xx

BoBunny supplies used:
Patterned Paper: Forever, Devotion, Lace, Passion : Love & Lace. 
Stamps: Stitches.
Washi Tape :Kraft.
Stickable Stencil : Cascade.
Glimmer Mist : Gold.
Jewels: Licorice.
Blossoms: Natural Earth Zinnia, Wildberry Zinnia, Wild Berry Bouquet. 


Saturday, 19 December 2015

A weekend with " Document December "

Helloo

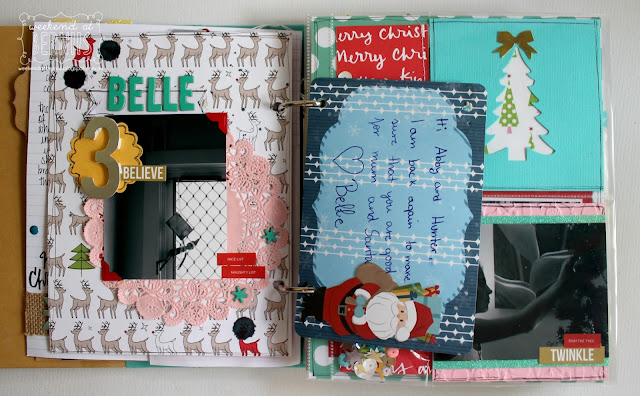
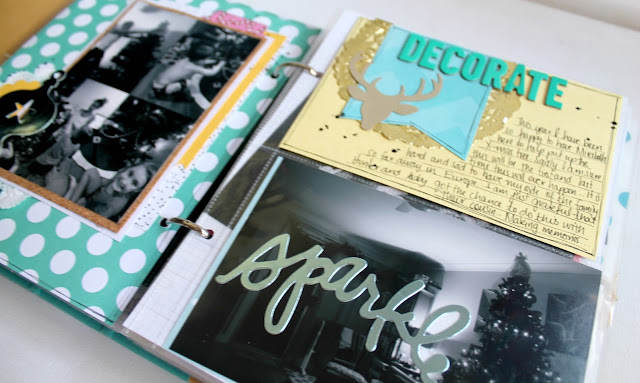
Well I have the next instalment of my December Daily album to share with you today, using The Stamp Spot Document December kit. 

You can see the first part of this album HERE

So without further ado here are the next few pages :) 

Document December mini album by Bernii Miller for The Stamp Spot.


Document December mini album by Bernii Miller for The Stamp Spot.


Document December mini album by Bernii Miller for The Stamp Spot.


Document December mini album by Bernii Miller for The Stamp Spot.


Document December mini album by Bernii Miller for The Stamp Spot.


Document December mini album by Bernii Miller for The Stamp Spot.

Well thanks so much for stopping by 

Till next time 
Much love 

Bernii xx

Friday, 18 December 2015

A weekend with " Document December with The Stamp Spot"

Helloooo


Well I finalllyyyyyy have the first share of my Documented December for The Stamp Spot

I love the kit that Michelle has put together again this year.. there are so many little bits and pieces to this kit and the pops of colour are totally making my scrappy heart sing. 

I decided again this year to create another black and white photo based album. I did this last year and I love how it turned out. You can see that HERE and HERE and another HERE

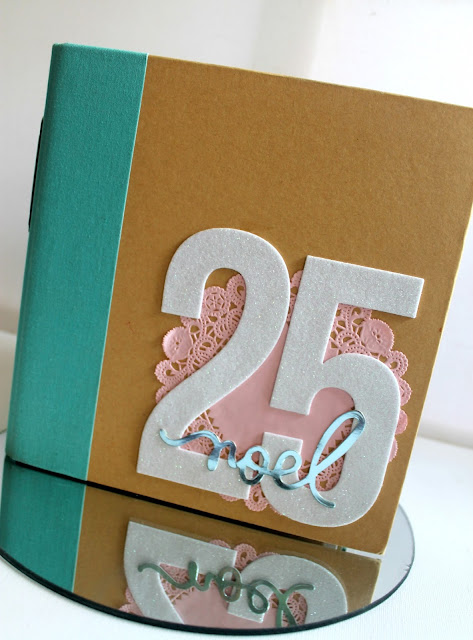
This year I am using the Simple Stories Sn@palbum in the aqua which I have been hoarding for a little while now. 


Document December album by Bernii Miller for The Stamp Spot.


I am not creating a daily album, instead a documenting album. I am documenting the Christmas "things" that happen around here. 


Document December album by Bernii Miller for The Stamp Spot.


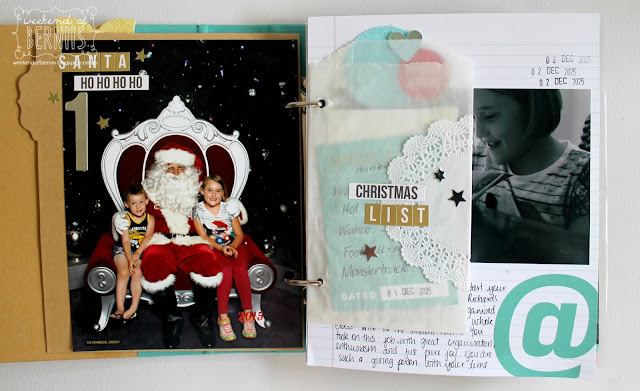
I had to include one colour photo into the album and that was the children's Santa photo. I did ask the ladies if they could print me a black and white photo and they looked at me like
I was from another planet..lol.. so I had to let that go..


Document December album by Bernii Miller for The Stamp Spot.


Document December album by Bernii Miller for The Stamp Spot.


Document December album by Bernii Miller for The Stamp Spot.


I am loving the simplicity of the album so far allowing more focus on the photos and hopefully the stories.

Thank so much for stopping by today..
Much love
Bernii xx


Thursday, 10 December 2015

A weekend with " Remember DT layout for BoBunny"

Hellooooo....


Last week on the BoBunny blog I had a layout share with the new Love & Lace collection. Oh Lordy I LOVED playing with this collection. It is so romantic and the colours are rich and the patterns are scrumptious. 

Let me share with you what I created....


Remember Layout by Bernii Miller for BoBunny using the Love & Lace collection.


Remember Layout by Bernii Miller for BoBunny using the Love & Lace collection.


I really love mixed media at the moment and love how with a few simple layering techniques you can create a multitude of different backgrounds. For this background I simply layered the "Rough it Up" stamp set over some watercolours and then to add some more textured interest I simply used some modelling paste with the Cascade stickable stencil.


Remember Layout by Bernii Miller for BoBunny using the Love & Lace collection.

I left the Hearts laser cut chipboard raw as the colour really complimented the colours in the paper I was using. To adhere them I used some Glossy Accents adhesive as I find it sticks really well to altered backgrounds. 

Remember Layout by Bernii Miller for BoBunny using the Love & Lace collection.


Thanks so much for stopping by 

Till next time 

Much Love
Bernii xx

BoBunny Supplies:
Patterned Paper: Passion, Together /Love & Lace.
Noteworthy:Love & Lace
Combo Stickers: Love & Lace.
Doily: Medium.
Glimmer Spray: Gold.
Kraft Gift Bags: Dots.
Stamps: Rough it Up.
Stickable Stencil: Cascade.
Laser Cut Chipboard: Hearts.
Stamp Block set.
Ink: Licorice.


Wednesday, 2 December 2015

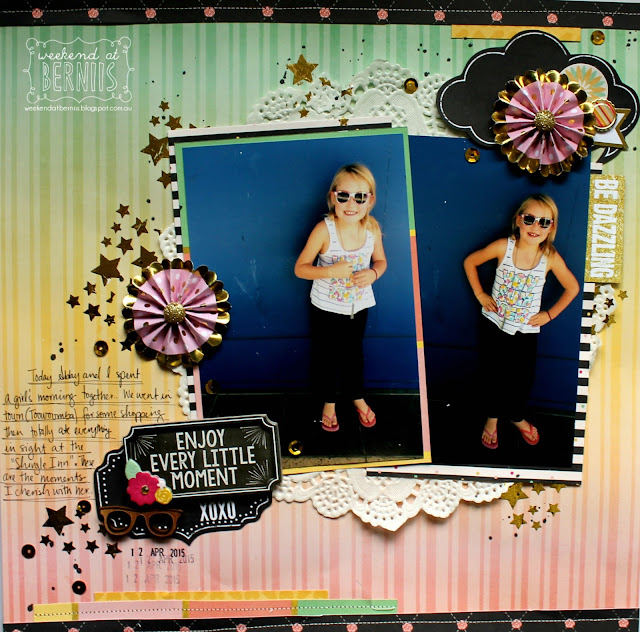
A weekend with " Enjoy Every Moment DT layout for BoBunny"

Helloooooo


I have a BoBunny layout share for you today with the You're Invited collection and the brand new super sparkly and shiny gold foil transfers. Seriously the new gold foil transfers are a total dream to work with. They go on smoothly and easily and you hardly need to rub them. 


Enjoy every little moment layout by Bernii Miller for BoBunny using the You're Invited collection.


You can see below just how shiny and sparkly they are when they hit the sunlight. 


Enjoy every little moment layout by Bernii Miller for BoBunny using the You're Invited collection.


Enjoy every little moment layout by Bernii Miller for BoBunny using the You're Invited collection.


I also used these new Gold Foil medallions that are also a brand new release item from BoBunny.  They are seriously the cutest and I need restraint when using them!! I want to put them every where, especially these pink ones. 


Enjoy every little moment layout by Bernii Miller for BoBunny using the You're Invited collection.


I LOVE this collection and I have so many more papers from the collection that I would still like to create with.. SoI best be off and play some..


Till next time 

Much love
Bernii xx

BoBunny Supplies Used:
Patterned Paper: Surprise, Festive, Bash, Hoopla/ You're Invited.
6 x 6 paper pad: You're Invited
Layered Chipboard: You're Invited
Brads: You're Invited
Doily: Large.
Gold Foil Medallions. 
Foil Transfers: Accents Gold Foil Transfers. 
Kraftwood: Moustaches. 

Saturday, 28 November 2015

A weekend with " Beautiful Gap" layout.

Helllooo


I have a BoBunny layout share for you today that I made using the gorgeous Genevieve collection that was bought out recently. I ADORE the colours in this collection.They remind me of the gorgeous porcelain my mother had in her kitchen hutch when I was little. It is that classic colour combination that will never go out of style. 

Beautiful Gap layout by Bernii Miller for BoBunny using the Genevieve collection


I had a really hard time trying to decide which patterned paper I wanted to use and decided in the end I wanted to somehow use most of the papers from the 6 x6 paper pad.  So to the rescue was my BoBunny tag dies . I used the second largest die which was a perfect fit for the 12 x 12 space.


I love the layered effect that it created and I love it even more that I was able to use so many of the 6 x 6 patterns. 


Beautiful Gap layout by Bernii Miller for BoBunny using the Genevieve collection


Beautiful Gap layout by Bernii Miller for BoBunny using the Genevieve collection


Thanks so much for stopping by today. 

Till next time 
Much love 

Bernii xx

BoBunny Supplies Used: 
Patterned Paper: Fanciful, Petite /Genevieve.
Cardstock: Double Dot Blueberry Vintage.
6 x 6 Paper Pad: Genevieve.
Noteworthy: Genevieve.
Combo Stickers: Genevieve.
Buttons: Genevieve.
Doily: Medium.
Double Dot Jewels: Citrus Jewels.
Kraft gift bags: Dot. 
Dies: Nested Terrific Tag die. 


Thursday, 26 November 2015

A weekend with "Calendar Girl Planner pages"

Hellllooooo

Last week over on the BoBunny blog it was my turn to share my new planner pages...


Calendar Girl Misc Me planner by Bernii Miller for BoBunny.


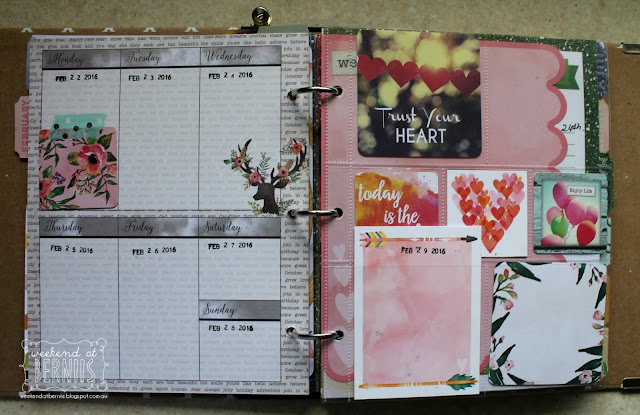
Today I wanted to share with you my set up of my planner for 2016 using the Misc Me products and the brand new and exciting Calendar Girl collection. I am a practical kind a girl so when it comes to my planner I need to be functional for me. Something that I can throw into my handbag and use at any given minute. As much as I love all the prettiness that can be added to planners these days I learnt very quickly with my planner from this year is that it can become very bulky very fast. 

So this is why I adore the new Calendar Girl collection . BoBunny have done an amazing job in adding so much colour ( which I love) , and these fun 12 x 12 pages that can be cut apart and used in the planner if you want to add in extra ephemera. I am loving that as it means I can add interest and still keep my planner fairly non bulky.


Calendar Girl Misc Me planner by Bernii Miller for BoBunny.


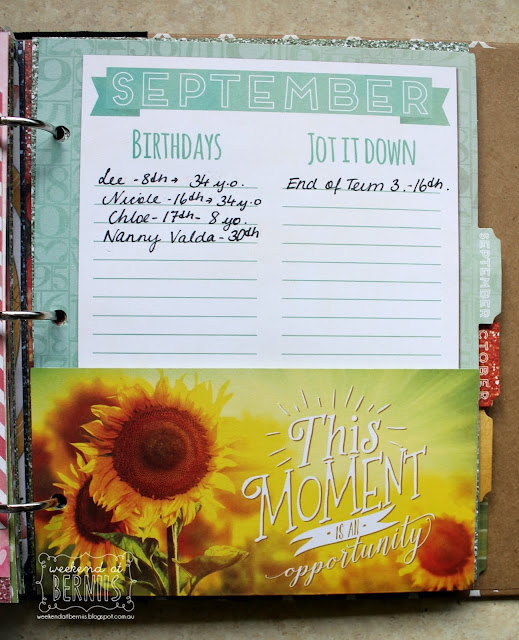
To start with I went through my Calendar Girl planner contents pack and added in all the month dividers . I then went through and made sure that each month had enough daily pages and if the didn't I went back and added in extra pages from the Journaling contents pack. 


Calendar Girl Misc Me planner by Bernii Miller for BoBunny.

I also went through and added in some plastic sleeves to parts of my planner in preparation of adding in photos down the track. I prettied them up by using the super cute Calendar Girl Journaling Contents cards that come in both and  4x4 and 2x2 sizes. 

Calendar Girl Misc Me planner by Bernii Miller for BoBunny.

Calendar Girl Misc Me planner by Bernii Miller for BoBunny.


Then to get organized I went through with my roller date stamp which I picked up from my local supermarket and went through and dated all the days. Then I went through with the Sentiments gold foil transfers and rubbed in all the birthdays that I have for the year. The Sentiments packet is chockers full of sentiments so I was able to add in a ton  of birthday reminders. 


Calendar Girl Misc Me planner by Bernii Miller for BoBunny.

The next two photos I added in to show you how I am going through now and adding in some of my favorite 3 x 4 cards that I cut out from the coordinating 12x 12 papers. Because I am not to sure of exactly how I will use these cards yet ( it will have to wait till June/ August for that) so to make sure I do not lose them I used the new super shiny and sparkly Chevron - Gold Foil washi tape. 

Calendar Girl Misc Me planner by Bernii Miller for BoBunny.


Calendar Girl Misc Me planner by Bernii Miller for BoBunny.


To make the birthday's stand out in the month at a glance calendars/pages I pulled out the Glitter & Foil Locale stickers and pin dropped all the dates. 

Calendar Girl Misc Me planner by Bernii Miller for BoBunny.

 And there you have it. It is a basic set up of my planner and I look forward to getting to play and use this everyday next year. I have all the pages and dates organised and have even added in some extra events that  I know are coming up next year. 


Calendar Girl Misc Me planner by Bernii Miller for BoBunny.

I hope I have inspired you to play with the Calender Girl collection and hope you can see how pretty and functional this collection is.

Thanks so much for stopping by..

Till next time 

Much love
Bernii xx


BoBunny Supplied Used;
Patterned Paper: January, February, March. April, May, June, July, August, September, October, November, December / Calendar Girl.
Journal Contents: Calendar Girl
Planner Contents: Calendar Girl
Journaling Cards: Calendar Girl
Glitter & Foil: Locale Stickers.
Foil Transfers: Sentiments Gold.
Washi Tape: Gold Chevron , Gold Foil Dot.
Gold binder clips.
Ink Pad; Licorice.
8 x 9 Binder: Misc Me White & Kraft Binder.
8 x 9 Page Protectors: Variety Pack.

Friday, 20 November 2015

A weekend with " Happy" expo layout.

Heeellloooo


Well I thought I would share with you the layout that I created for the Brisbane Scrapbooking expo that was on in the June long weekend . I was lucky enough to teach on behalf of Couture Creations and Craft Giraffe. It was an awesomer three days and the ladies in my classes had their work cut out for them ( literally) .

If you are in a class with me or have been in the past then you will know that I tend to create layouts with a lot on them. This was no exception. I made sure the ladies were going to walk away with a layout that they could be proud of making.. a mini labour of love. 

I used the gorgeous Vintage Rose papers for this layout and dies from the Kalini collection. 


"happy" layout by Bernii Miller for Couture Creations using th Kalini Collection


"happy" layout by Bernii Miller for Couture Creations using th Kalini Collection


"happy" layout by Bernii Miller for Couture Creations using th Kalini Collection

The experience was amazing and certainly one I now get to tick off my bucket list of things I want to do!! This was a scrappy dream come true!!!

Thanks so much for stopping by

Till next time 

Much love 
Bernii xx

Wednesday, 18 November 2015

A weekend with " Scraproom room make over"

Helllooo


This a rather long over due post about my scraproom. I have had every intention to create this blog post,but for  some reason or another I just never got around to it. This was a room clean out I did back in March as I literally got to point where I could not walk into my space without having a heart attack... It felt so overwhelming to walk in there and I clearly got to the pointwhere I just had to much stuff on hand. 

I am lucky that I have a space that I can set up my supplies in ...Although this space is in my walk in wardrobe. So I have to share my space with my dresses and running shoes. It is small butI make it work for me. I am glad that it is small as it means I can have more stuff on hand at close reach.  

So let me show you the mess that was..

These shelves were an awesome steal.. They were a giveaway at the local kindy where I work and as soon as I saw them I thought that they would be perfect to store whole collections in them for with the Design Teams that I work for.


Below is my thickers storage .. ummmm.... I am still trying to figure out if there is a better way to store these bad boys. I have them up right here in colour groups. On these same shelves I also have mini albums that are a work in progress. 


Sigh.. I am not to sure what the  comotion below is. I guess because my space is so small and already so packed to  the brim with goodies., I though the next best plan was to go up. Well I thought that was a good plan.. All it did was create a tower of Project Life goodness that I could not even climb. 


Look away now if your OCD will kick into over drive or you are partial to fainting!! Below is my desk top and where I am MEANT to relax and push pretty papers around. Instead it has become a nightmare of where I shuffle around mounds of papers and embellishments.. ......Sigh.... 

I can't breathe...


And last bust not least this is the space under one of my clothes rack as you can see squished into the left of the photos are some of my clothes. So I have to climb over "stuff" just to be able to get dressed every day.. It is such a pain in the butt!!!


So I did a major cull,although I am sure that I could have gotten rid of more stuff. 
i t makes me almost cry when I see how much money 
I have spent on product that has esentially been sitting in storage in my scrap room.


So below are pictures of how I have organised my room this time around..

So this is the view as soon as you walk into my space. 


I gave a clean out to the shelves below and have kept most of mini album gear here and also kept my thickers here. 


I then re organised my Raskog cart with Project Life cards that I am likely to use. 
although I have not done any PL in so long..lol..


Then this is the not so glamorous side of the room but this is my wardrobe. My scrapbooking supplies are taking over the clothes..


This is where all the magic happens so to speak. I love my desk , although I do often wish that I bought a white desk as this kinda looks daunting in the dark wood. Although the furniture in my home is all dark so at the time that was the reasoning for buying it. 


It makes me so happy when I can see the top of my desk. Especailly when it is this clean. It makes me want to actually sit and scrap - not run the other way and hide. 


This little white shelf was the best $20 that I have spent for my scraproom. It is perfect to fit all the little bits and bobs that I seem to reach for every time I scrap. 


I have kept this little tub on my desk with some of my latest purchses in hopes that I remeber that 
I have them and might actually use them. 


I went through and sorted these mini alphas by colour and used some really old cardstock that I hade been hoarding as dividers. It was a chance to use older cardstock that I would never use otherwise. 


To the right of where I sit at my desk is a little adhesive bucket. I have pooled all my adhesives here so that they are readily available. 


Below is an old library card drawer that I managed to find at a local quilt exhibition/ market stall day. It was a bargain so I snapped it up right away. I use it now to store my 6x4 Project Life cards by collection. 


I decided to store and sort my paper by collection. 
I found over the years I tend to gravitate more towards only using collections. So I bought this cheap shelf as a temporary option until I can buy another Expedit shelving unit to go here. 


I found these super awesome containers at my local Daiso store so I bought what they had left in the store. I have gone back so many times to try and buy more but it seems that perhaps they are discontinued.. sigh.. that is always the way right ???


As you can see they fir the 12 x 12 papers perfectly. 


Then in the corner of my space and to the right of my desk I have set up a sewing and cutting station with all of my metal dies on hand. 


Well I hope you have enjoyed looking into my tiny scrap space.. I am forever looking at better ways to organise and access my goodies.. but I think that is what all scrapers do right??? organise, then re organise.. 

Well thanks so much for stopping by 

Till next time 

Much love 

Bernii xx


Related Posts Plugin for WordPress, Blogger...